Overview
As a web designer and a developer, having an online platform to showcase my skills, work history, and personality is more than essential. Having obtained quite a bit of experience and knowledge in several frameworks over the past year, I figured it's only appropriate to create an updated portfolio that reflects on my most recent work and journey.
Challenges
-
- Design research & prototype creation
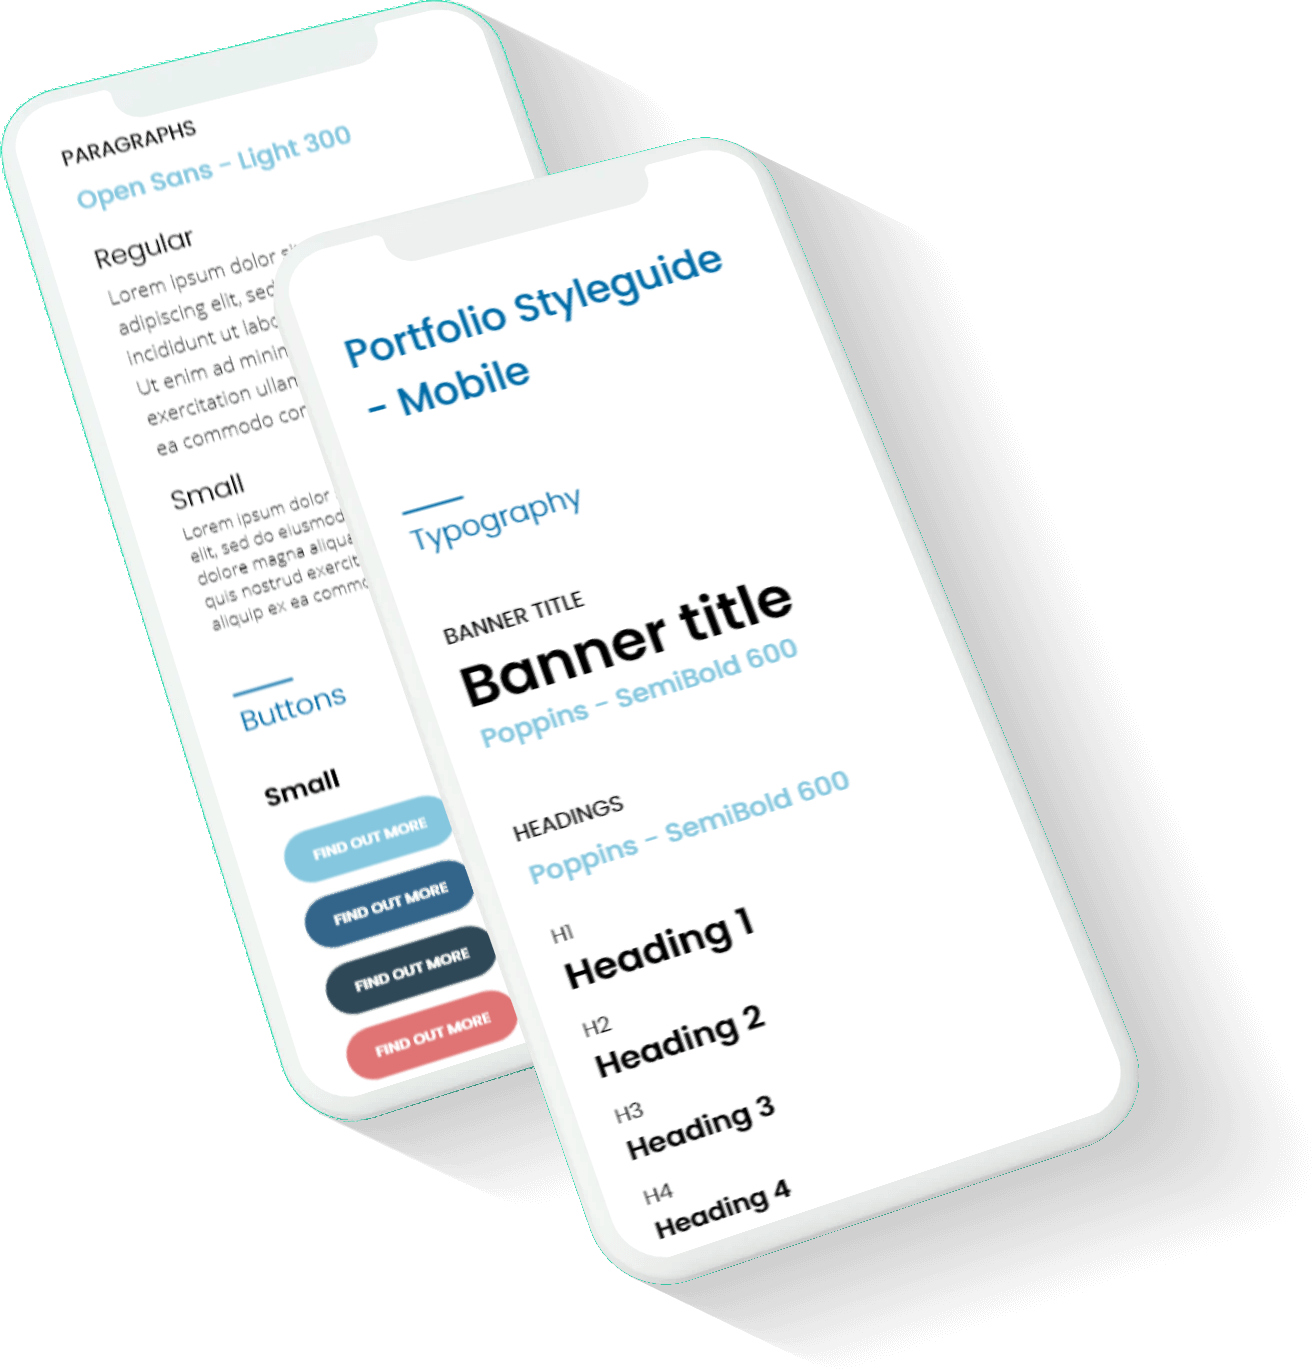
Before proceeding with any code development, I had to ensure I have a clear vision of what my portfolio design would look like by checking the recent trends in popular UI design platforms like Dribbble & Behance. I also needed to create a style guide of fundamental components for my portfolio (buttons, heading styles, cards, etc.) that I would use for creating a high fidelity prototype.
-
- Code development
Working solely on a single project can sometimes be daunting in terms of losing focus and having consistent results. This artefact required steady levels of attention and planning by using the right tools for progress tracking and testing. Additionally, it was crucial to identify the most time-consuming and challenging tasks, which would help me allocate enough time for those jobs.
-
- Testing & Deployment
The majority of the locally developed features of my portfolio had to be thoroughly tested on a remote server and tracked with version control. Moreover, verifying that my website is rendered correctly on a range of devices required frequent live testing, accessibility & speed checks and server-side optimisation, which would hopefully increase the speed and overall performance.
Process
1. Look for inspiration in recent design trends
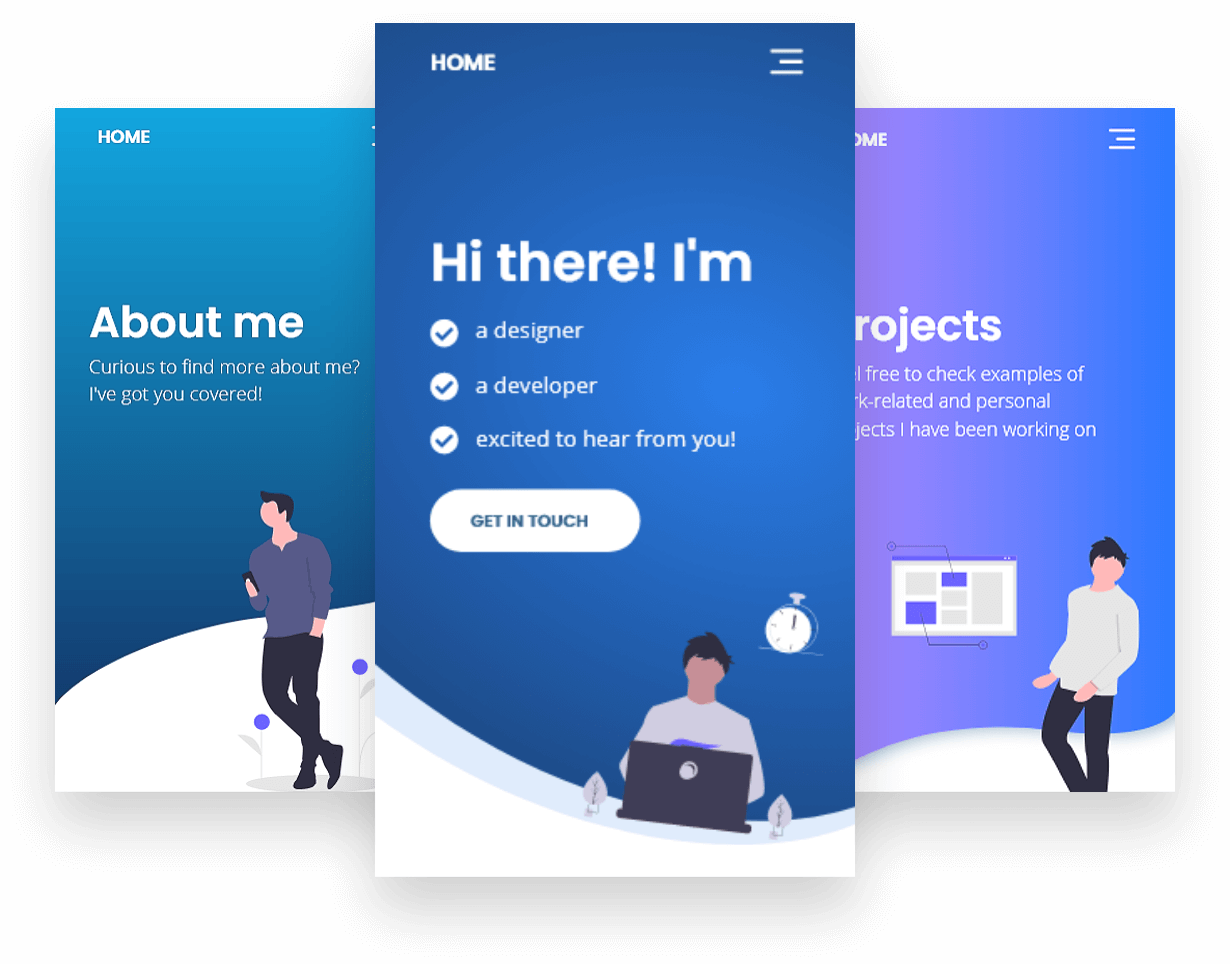
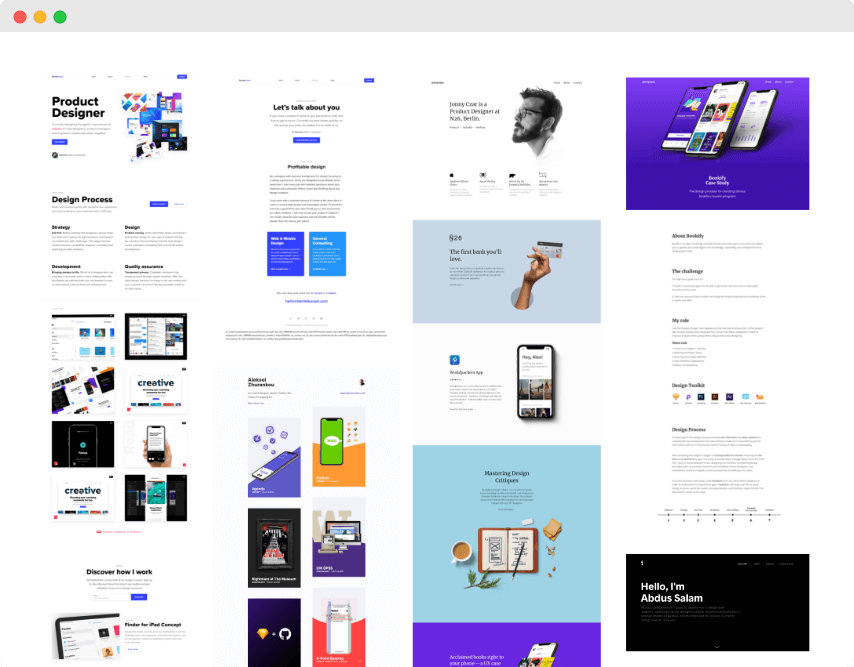
The portfolio development process was initiated by creating a vision for the website's look and feel. I spent quite a bit of time checking award-winning portfolios and impressive mockups that helped me get a better understanding of what my website needed to have and how to make the design reflect my personality. I created an inspiration board which contained several screenshots and ideas of how to organize the content and present it appealingly.
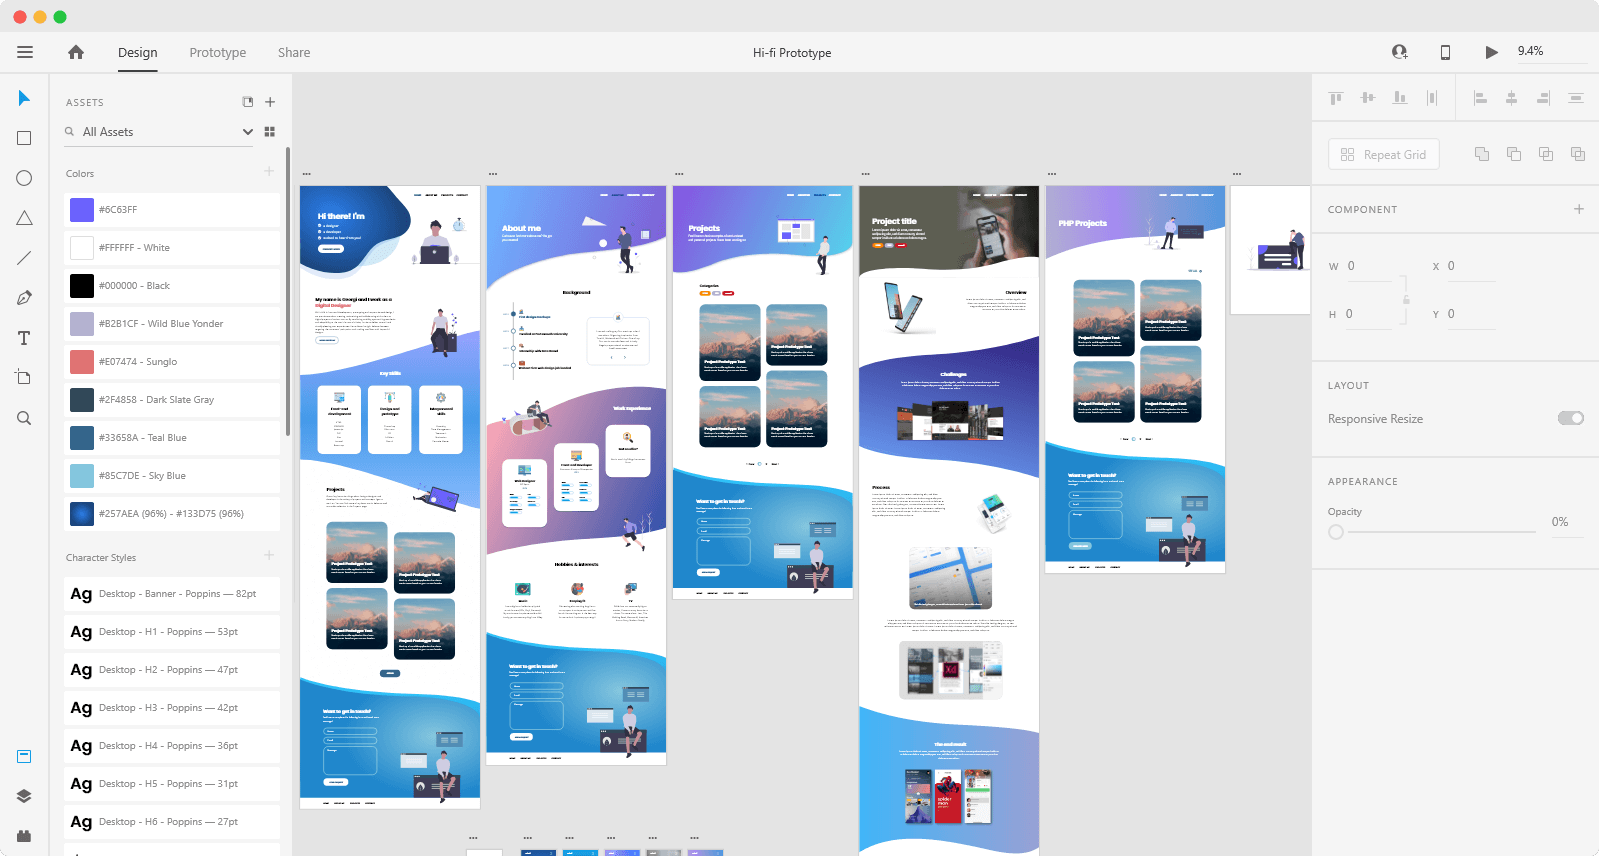
2. Lo-fi and hi-fi mockup development
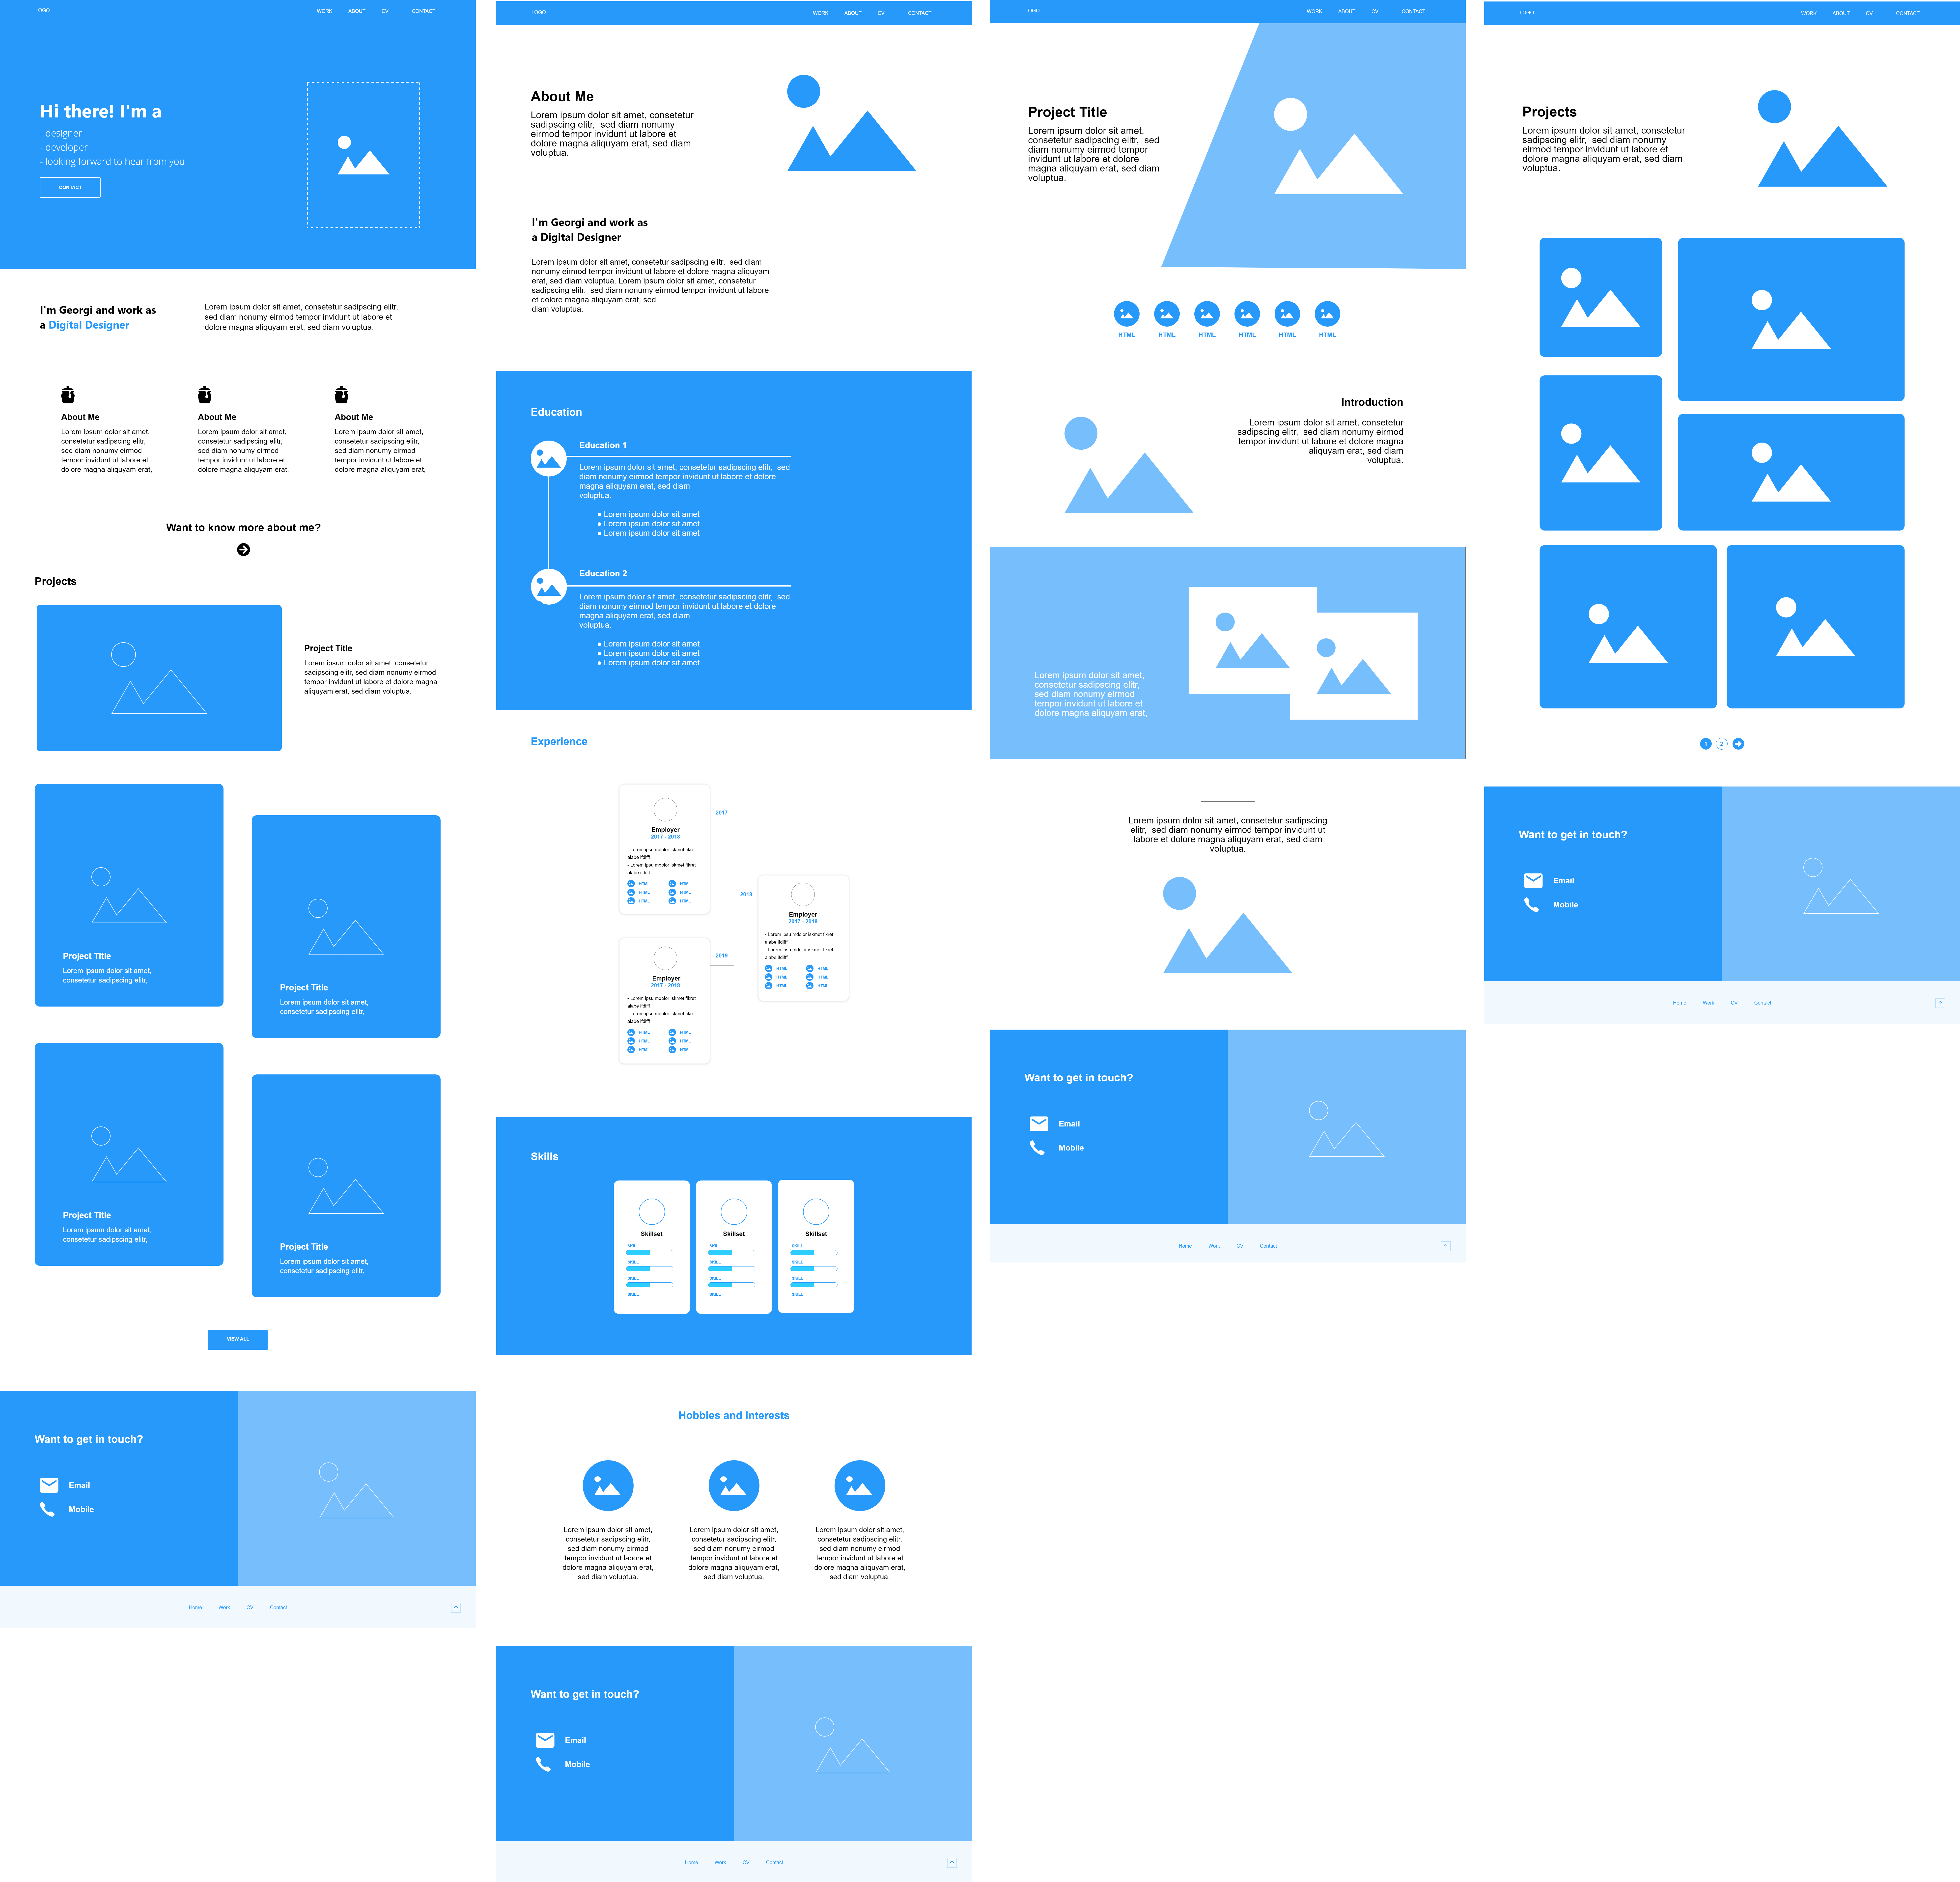
As soon as I got an idea of what a portfolio in my industry needs to look competitive, I proceeded with drafting a mockup on Adobe XD using designated wireframe kits. At this point, it wasn't necessary to focus too much on the visual aspect (lack of colour and imagery) but rather concentrate on the layout and its components.
Once I was comfortable with the lo-fi sketch, I proceeded with creating a high fidelity version of the prototype. During that stage, I came up with a style guide of reusable heading styles, buttons and card elements that would help to create a unified and synchronized design. Adobe XD's components' state, repeat grid, cloud storage and phone preview app functionality contributed to a fluid process which made the testing, editing and updating of the mockup more straightforward than I'd expected. Additionally, the XD plugins ended up being quite useful for adding imagery and gradients, especially PhotoSplash (free stock categorized images generator) and unDraw (attribution-free SVG illustrations).
3. Codebase initiation and reusable component implementation
The design creation process took me about a week as I spent quite a bit of time playing with different styles, abstract/fluid shapes, gradients, colours and positioning. It was crucial to reach a certain level of confidence with the overall look that would prevent frequently going back and forth between design and development. As soon as I completed that stage, I went on to set up the foundations for code development. I initiated a git repository, installed some base packages (Bootstrap, Laravel, Vue, Axios) and set up a temporary testing environment on a remote server which would allow me to test my progress on my phone simultaneously. For the latter I used Heroku which required some tweaking of the .htaccess and Laravel .env files.
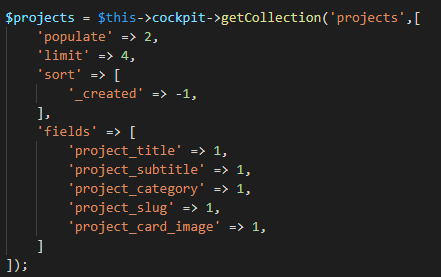
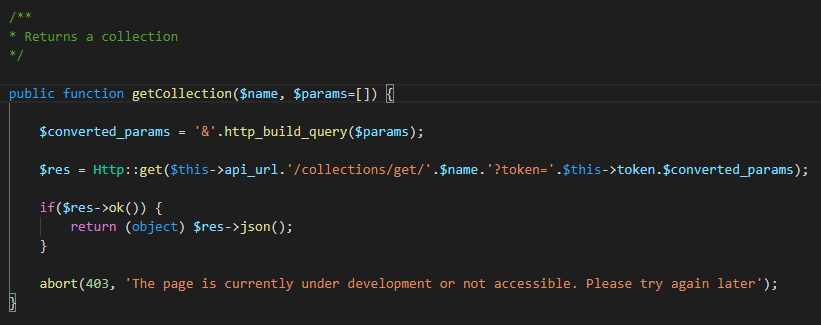
Make connections to the headless CMS
Before creating the reusable components (navigation, footer, contact form, etc. ) I had to take care of the methods that would help to extract dynamic data. As I felt confident enough to approach a headless CMS solution (Cockpit), it was essential to initiate the connection to the platform's API first. For the purpose, I decided to test Laravel 7's handy new HTTP request making functionality, which eliminates having to install and configure Guzzle separately. I also succeeded to find a way to quickly add optional parameters when making HTTP requests and enable this functionality within the Laravel controllers so that I can send CMS data on all pages with a single reference.
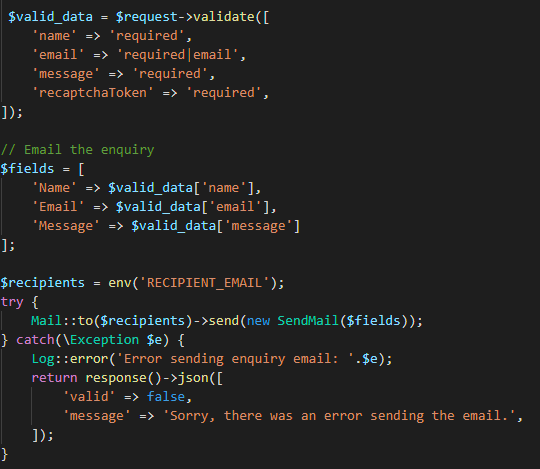
Create a contact form
The most time-consuming feature to develop was the contact form due to implementing several Vue JS libraries in one component. Some of these were Google Recaptcha verification, input field validation, email notification and scroll animations. The Vue chrome inspector was crucial for debugging those features while the Laravel log functionality made identifying server errors related to the email creation service relatively easy.
Conclusion
Although I've been through the process of creating online portfolios before, my most current one was arguably the most challenging. Incorporating CMS data (via PHP and Vue), dynamic contact form and reusability across the site was a learning process that may have caused some headaches but also motivated me to be persistent and keep learning.